Google+
Showing posts with label Purple. Show all posts

Sunday, July 10, 2016

Husband Picks My Eyeshadow!?!

I had all of these blog posts planned and written out and I just knew it was going to be a good month! I was so ready to go! Unfortunately, nothing ever works out in my favor. My Mom is still having issues after her surgery, my Grandmother was back in the hospital with issues stemming from her colon cancer surgery and then I got a pretty disheartening email. It was a rejection email from a company and honestly, 99,9% of the time they don't bother me. This one however was pretty damn disheartening. I was told my blog wasn't good enough and I myself were too "heavy" to be accepted. I'm not naming names, but that is just something not nice to say at all. I was told to apply again in a couple of months and "maybe" I would be accepted then. Excuse me? I was just insulted and they still want me to apply again?! No thanks. >( So I've been feeling really crappy about not only myself but I have been feeling pretty shat about my blog. It's not a great feeling.

Currently however, I am being howled at by Simba the needy Sable Point Siamese Cat. He is a needy pain in my butt. Ginger is sitting at the table in front of me who is dubbed my Tuxedo Stalker and Anya is just Anya. We all know how she is. Cute but plotting your death. I love my cats though! I wouldn't trade their crazy butts for the world. 

Another side note. I went to Chipotle with my Cousin for the first time and I felt basic as hell and was not impressed. It was not that great, I have had better.


Too Faced Shadow Insurance
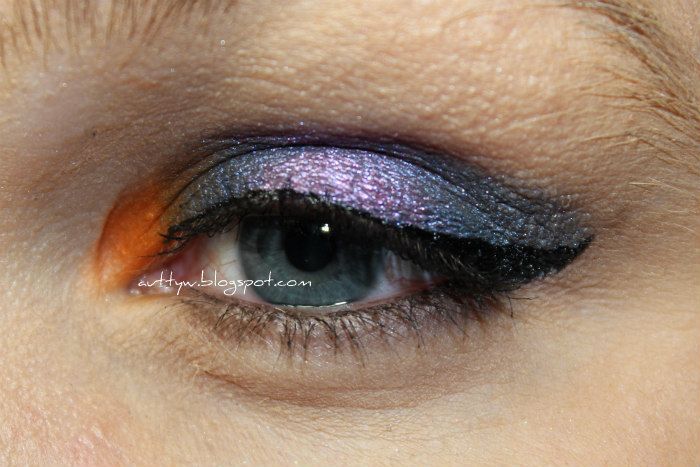
Mustaev Single Eye Shadow #104 Smoke (lower lashes)*
Stilazzi MS28 (orange)
Maybelline Color Tattoo 75 Electric Blue (base)
L'Oreal Infallible 759 Burst Into Bloom (center of lid)
Urban Decay 24/7 Glide On Eye Pencil Demolition
Mustaev Max-Volume Mascara*
Temptu Pro S/B Primer*
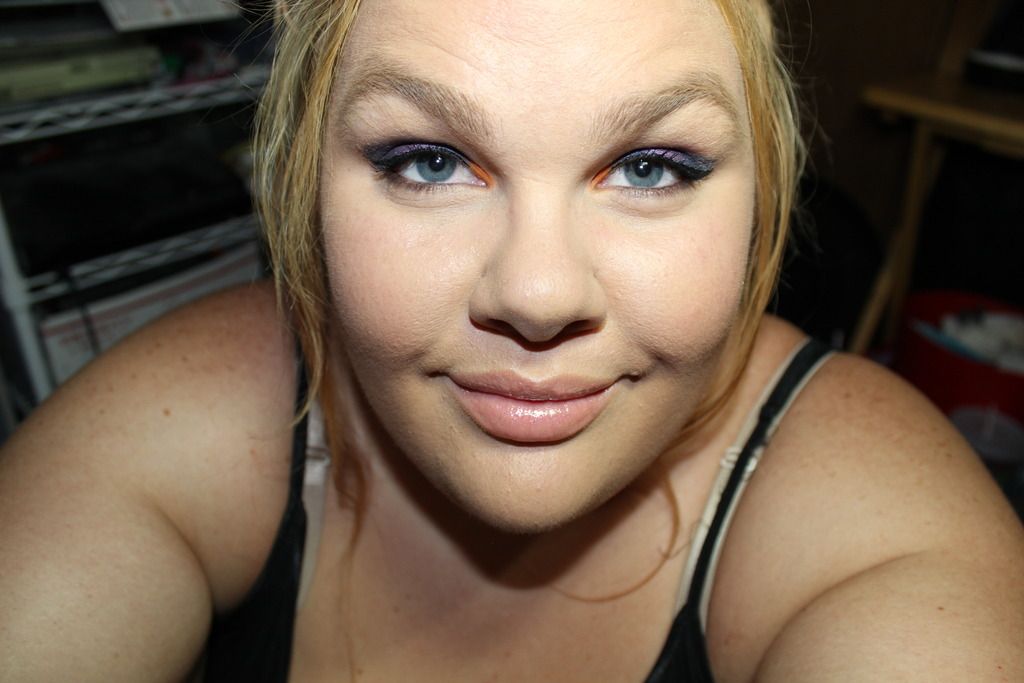
Maybelline Fit Me! Matte+Poreless 220 Nude Beige
The Body Shop Shade Adjusting Drops Lightening*
Cara Cosmetics Nagoya
Becca Cosmetics Beach Tint Souffle Watermelon/Moonstone
Mac Mineralize Skin Finish Natural Medium
Nars Light Reflecting Press Powder Translucent Opal*
Kevyn Aucoin The Precision Brow Pencil Brunette*
NYX Conceal.Correct.Contour
Bare Minerals Marvelous Moxie Lip Gloss Birthday Babe

Ignore all of my griping. I guess I really have no excuse. The one thing I DIDN'T Mention though was I let Chris pick out the eye shadows that I used. He didn't do half bad, so lets all applaud Chris! 

Best,
Autty
Some products marked with a (*) were provided for free

Wednesday, May 7, 2014

The Beauty Buffs - Radiant Orchid Eye Look

Hello my loves!

I hope your week is going swimmingly! I welcome you all back to another installment of The Beauty Buffs!! I hope you all are LOVING these as much as I am loving doing them for you all! The prompts each post have really kept challenging me and it's re-awakening my love of blogging! I've got a lot of lovely stuff planned in the upcoming weeks! But all of that aside, let's get crack-a-lackin'!

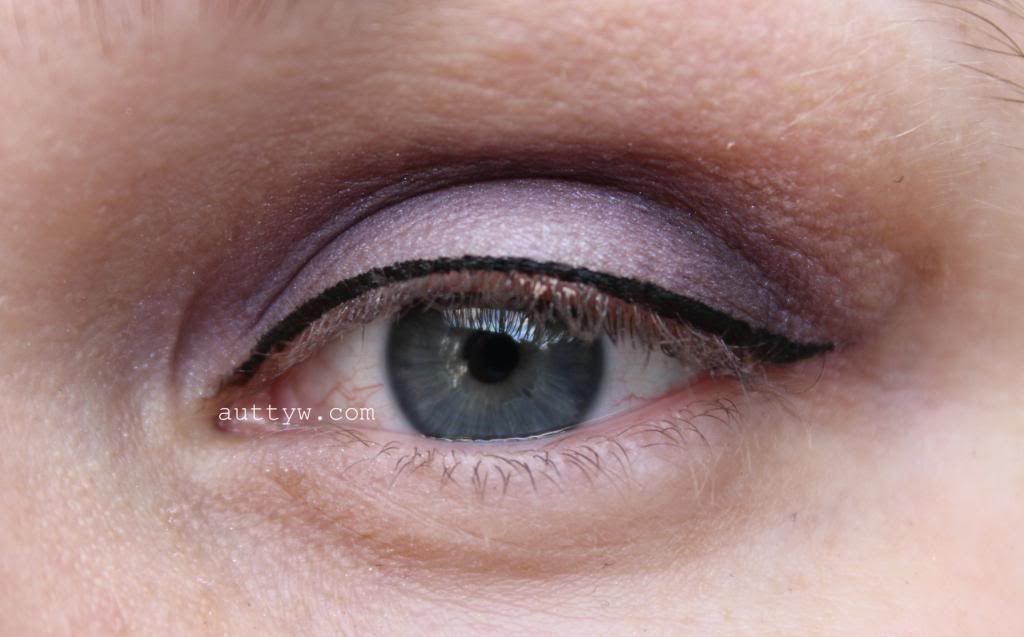
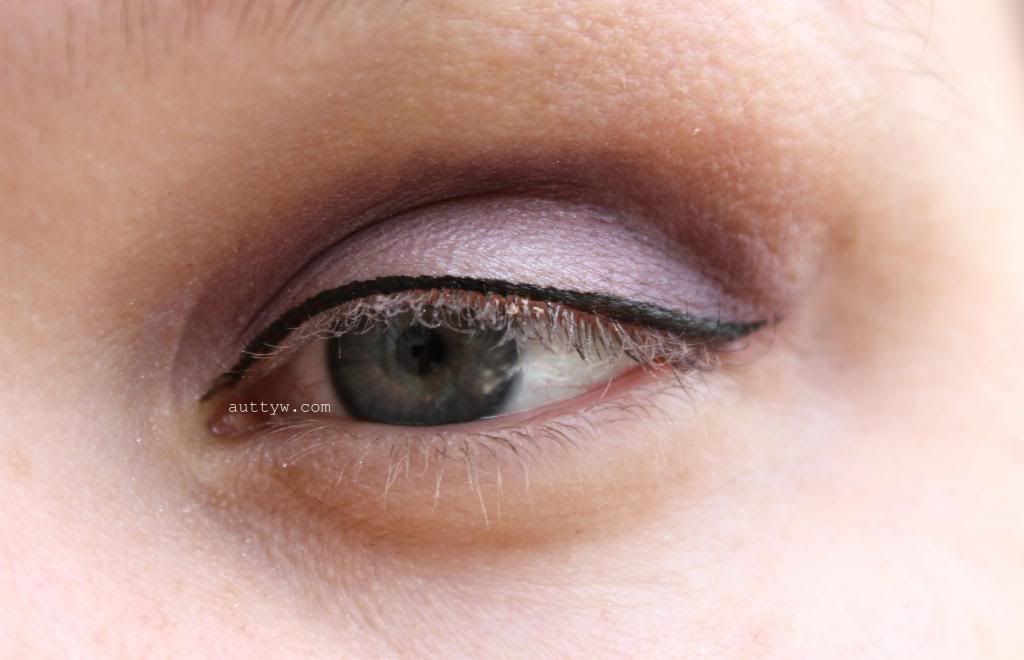
I created this look, oh goodness a month ago?! It was the first time I used the Wet n Wild Flirting At The After Party palette that I had gotten from my Hobby Polish Bloggers Swap buddy. To be honest, I wasn't sure WHEN I was going to upload this, but I figured this would be the perfect time to use it! 
Products Used;;
Urban Decay Eye Shadow Primer
Wet n Wild Flirting At The After Party palette
Milani Extreme Eye Tech Liquid Liner
That's it. I didn't wear mascara or foundation. I've found that I haven't been wearing mascara as of late... Call me lazy :P I can't even remember which shadows I used out of the palette, I thought I wrote them down, but I can't find the paper! boo on me. 

I LOVE this eye look and I definitely need to try and recreate it! :D 

Don't forget to check out the other ladies posts! I'm so excited to 

An InLinkz Link-up

 photo signature_zps5ed1b0d3.jpg

Monday, January 27, 2014

Mint Chocolate Interlocking dots

Hey everyone! I hope you are doing well!!

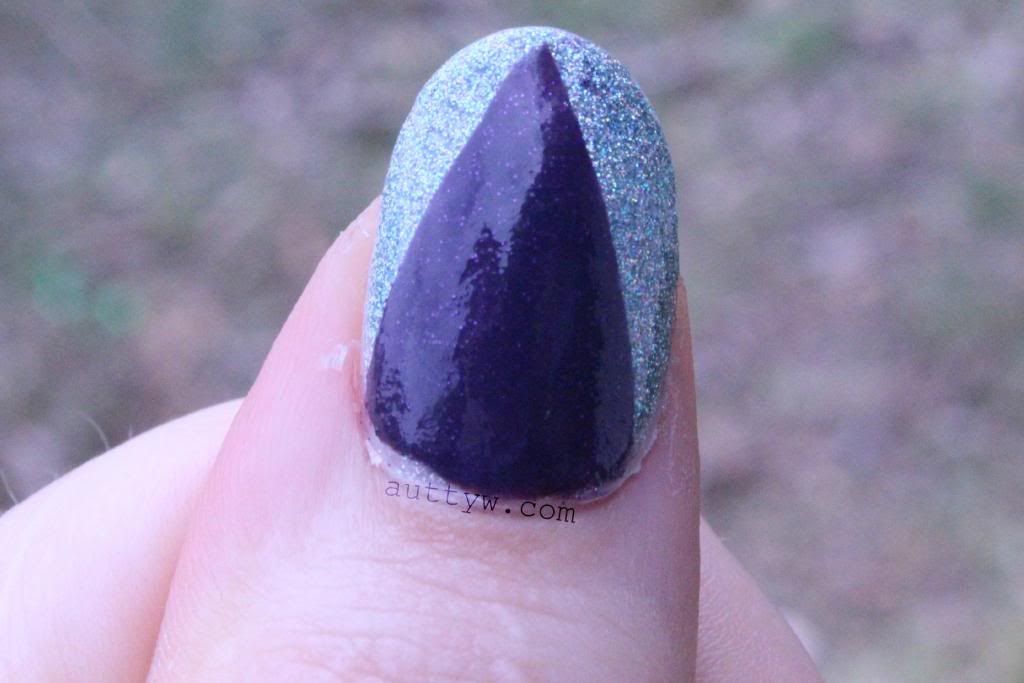
This manicure isn't what I originally planned but I'm totally not used too long nails and I had an insane time trying too get the striping tape straight!! I don't know how you ladies do it, seriously I applaud you all!

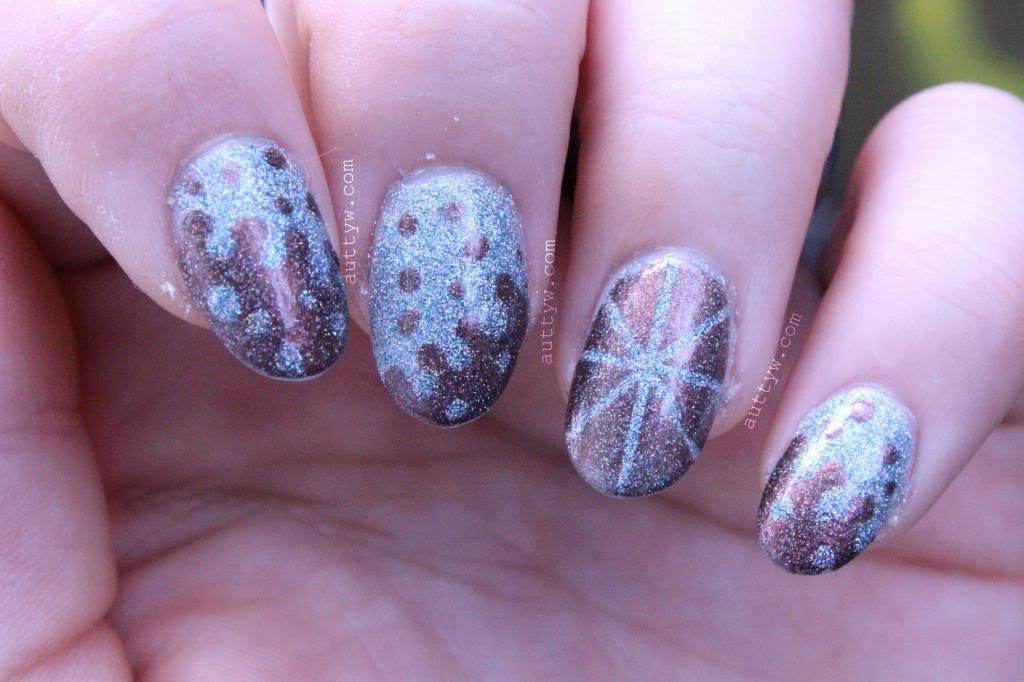
My base for all of my nails is Nubar Green Silver Glitter. That's across ALL nails.

I used Cult Nails Spontaneous and taped off a triangle (not a straight one you LOL) You can kind of see the pink shimmer in Spontaneous, but I think it tones down the holographic, can't keep your eyes off of your nails look of GSG.

TADA!

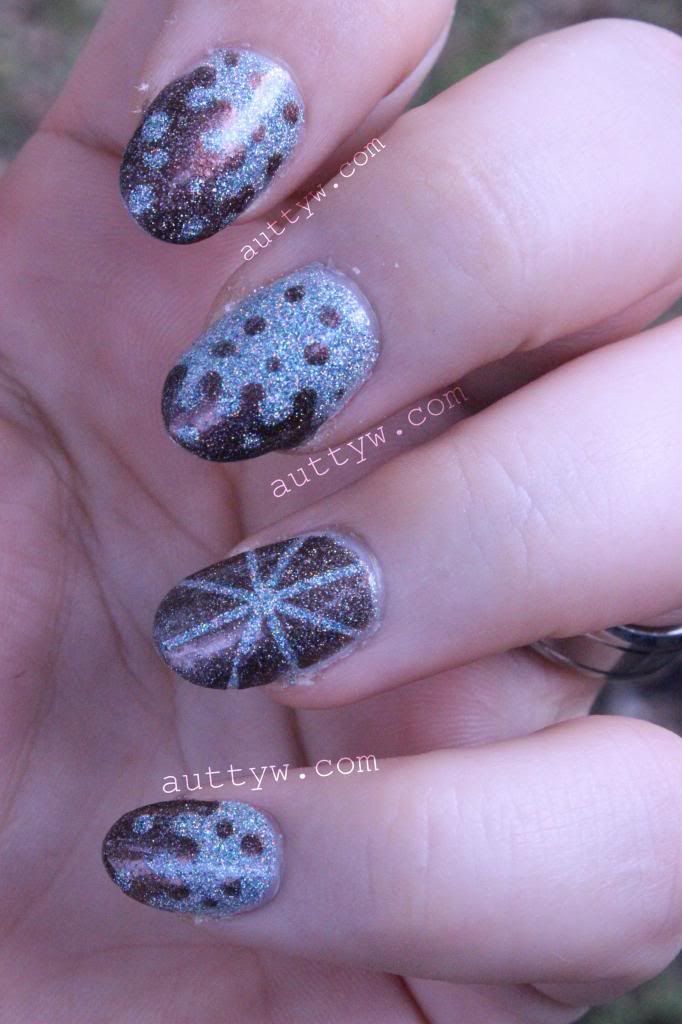
To create the dotticure, I first taped off the section that I wanted to paint with Nubar Jewel. After I painted the section I let it dry slightly then started doing the dots! You definitely don't have too tape off the section though I didn't with my right hand. :P #rebel I'm sure there are tutorials out there on how to create an interlocking dot mani, but I can always do a tutorial if you would like... It's really really easy.

I seriously LOVE how this turned out, it kind of reminds me of chocolate ice cream dripping... Is that weird? Did I just make you want ice cream?! :P On my ring finger I used striping tape to create the sunburst. The hardest part was to get the vertical line straight down the middle, then it was a walk in the park.
I topped the entire mani off with Glisten & Glow HK Girl Top Coat


I love this mani seriously. What do you think?!


 photo signatureuna_zps1d5464f3.jpg
All  of the polishes were purchased by me with my own money with the exception of G&G HK Girl Topcoat.

Sunday, January 5, 2014

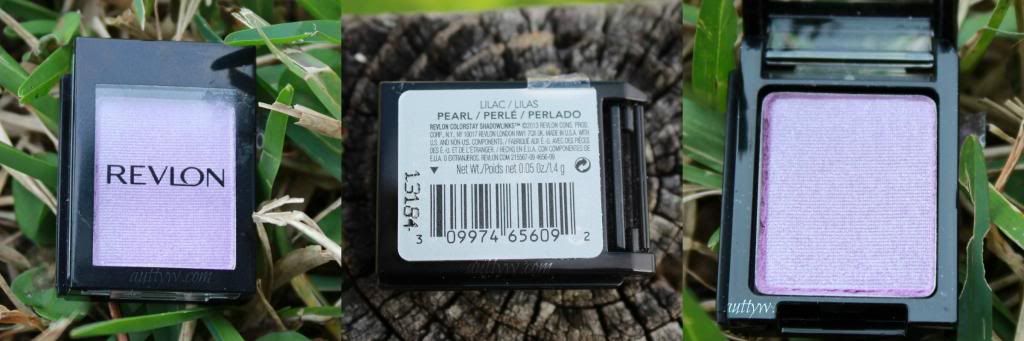
Revlon ColorStay Shadow Links Plum & Lilac

Purchased Myself

I've seen the display for these shadows every time I walk into Walgreens and normally I just pass on them. I've not really heard any buzz or actually really anything about these shadows. In fact I've had ONE blog post about them come across my computer, that is IT! On Christmas I decided to pick up a couple of these and for $2.99 you can't really pass them up in good conscious anyways. The Cashier compared these to the Urban Decay build your own palettes, I'm no sure if she was talking about because you can create your own "palette" or quality wise. I told her we would see how these held up against UD.

Lilac is just that, a lilac with fine silver glitter in it. 

Friday, January 3, 2014

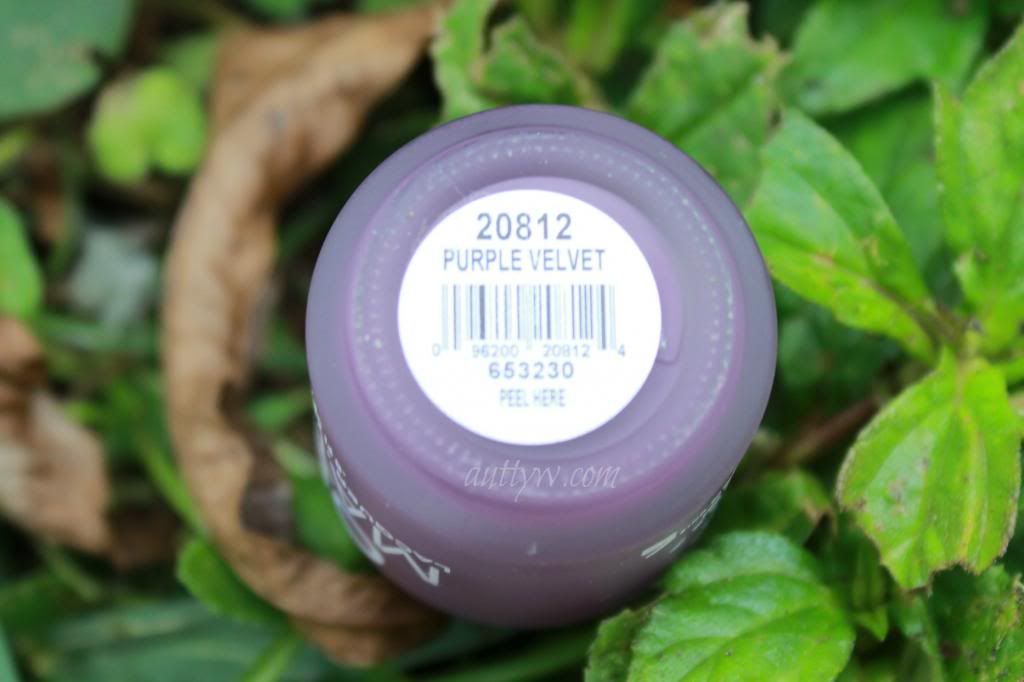
ORLY MatteFX Purple Velvet

Purchased Myself

I'm thinking of doing a Blue's post showing all of my blue nail polishes. I know that it's a popular tag on Instagram, and I have more blues then I thought I did. What do you think?!


I've figured out a way to do nail swatches on myself, unfortunately my nails are in a SAD state of affairs, so maybe I shouldn't do them on myself, until my hands are in better shape. Baha, What's done is done though! I'm also fiddling with hand poses, so please excuse randomness and possible shoddy-ness of the pictures.

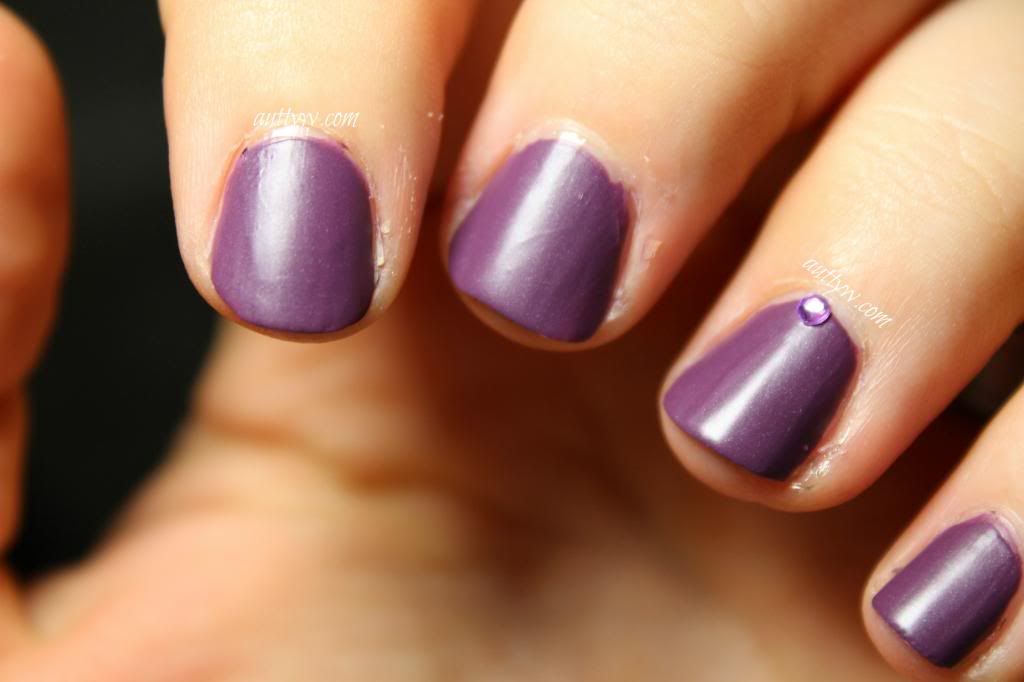
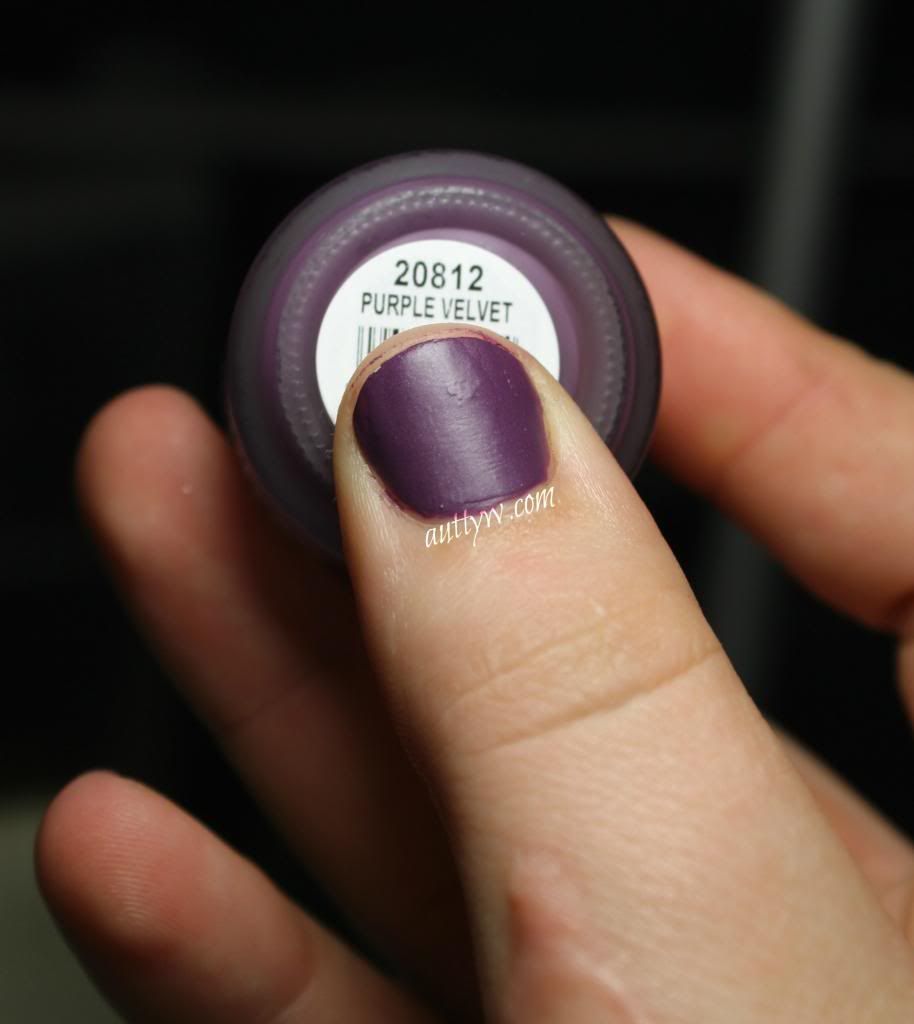
ORLY MatteFX Purple Velvet is a deep purple matte polish. This DOES have very tiny micro shimmer in it, which you don't notice unless you really LOOK at it. 

I'm sure that you can tell that this nail polish does NOT self level.  Depending on the length of your nail you could possibly get away with one coat, I however used two coats. That is what I am more comfortable with.

\

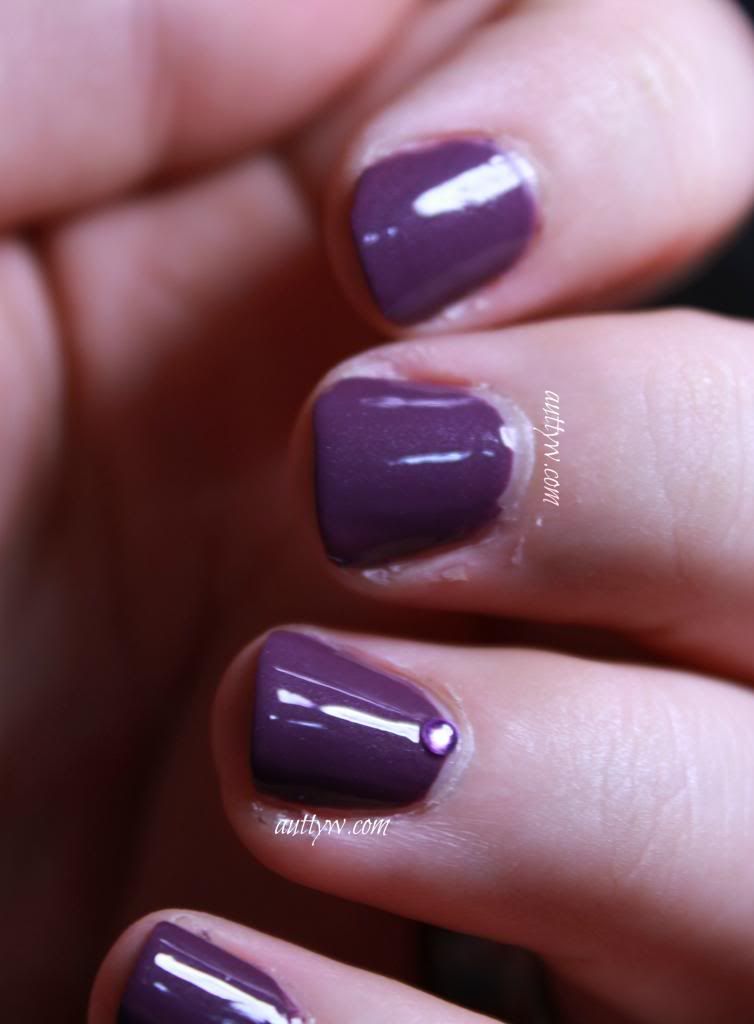
And of course because I couldn't just leave it alone, I put a layer of top coat over it!

I actually kind of like this more with a top coat. I used Glisten & Glow HK Girl Top Coat and just look at that shine! Wowee!


My only issue with this polish is that it doesn't self level. I find with most matte polishes, they dry quickly and this was no exception. The entire mani from start to pictures was MAYBE 20 minutes, then it survived a shower as well. So kudos for this! Without the top coat though, I don't know if this would have lasted through the shower without chipping. 

You can find this polish for $8.99 at Sallys..BUT you may be able to find this on Clearance, that is how I got mine. 

What do you think? Top coat or no top coat?!

Thursday, December 26, 2013

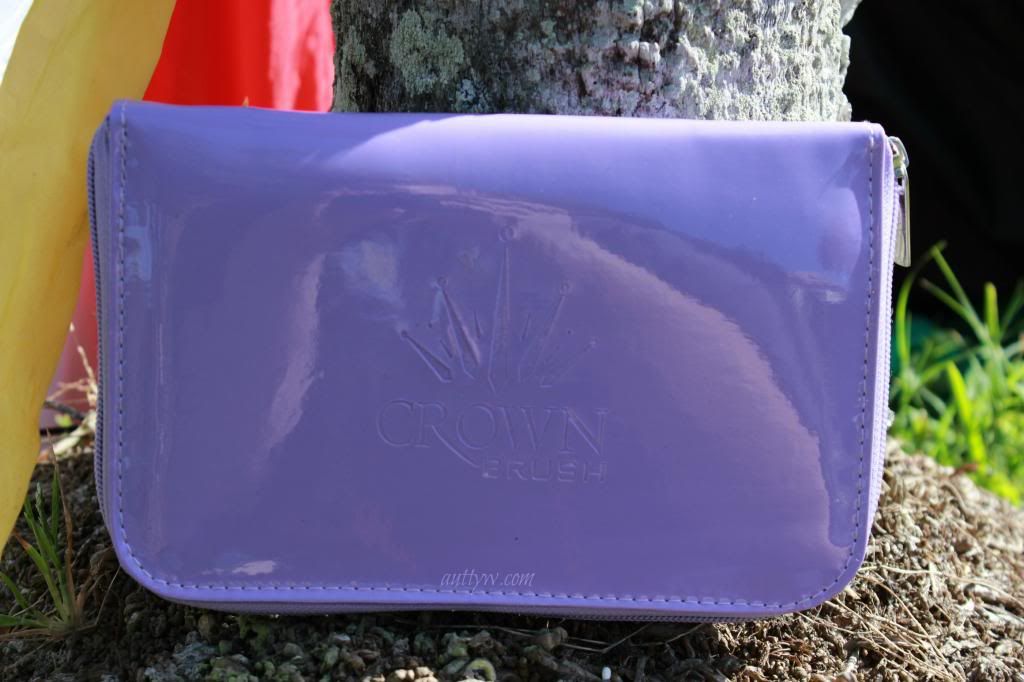
Crown Brush HD Set w/ Mirror & Tweezers - Purple

PR Sample | iFabbo

When I saw the opportunity to try out Crown Brushes HD Set of brushes, I jumped on the chance. I've been wanting to try their products for a quite a while now and until I start my job in January, my spending is kind of null except for gifts and what not. I'm so grateful that I was given the opportunity to try these out!

I LOVE the color of this case, it's such a nice shade of lavender. The set also comes in Orange/White and White/Blue. I really like this case, it's vinyl so it is VERY easy to just wipe clean if you spill something on it, or it gets dirty with makeup. The inside is the same way, so this is very good for daily and travel use. 

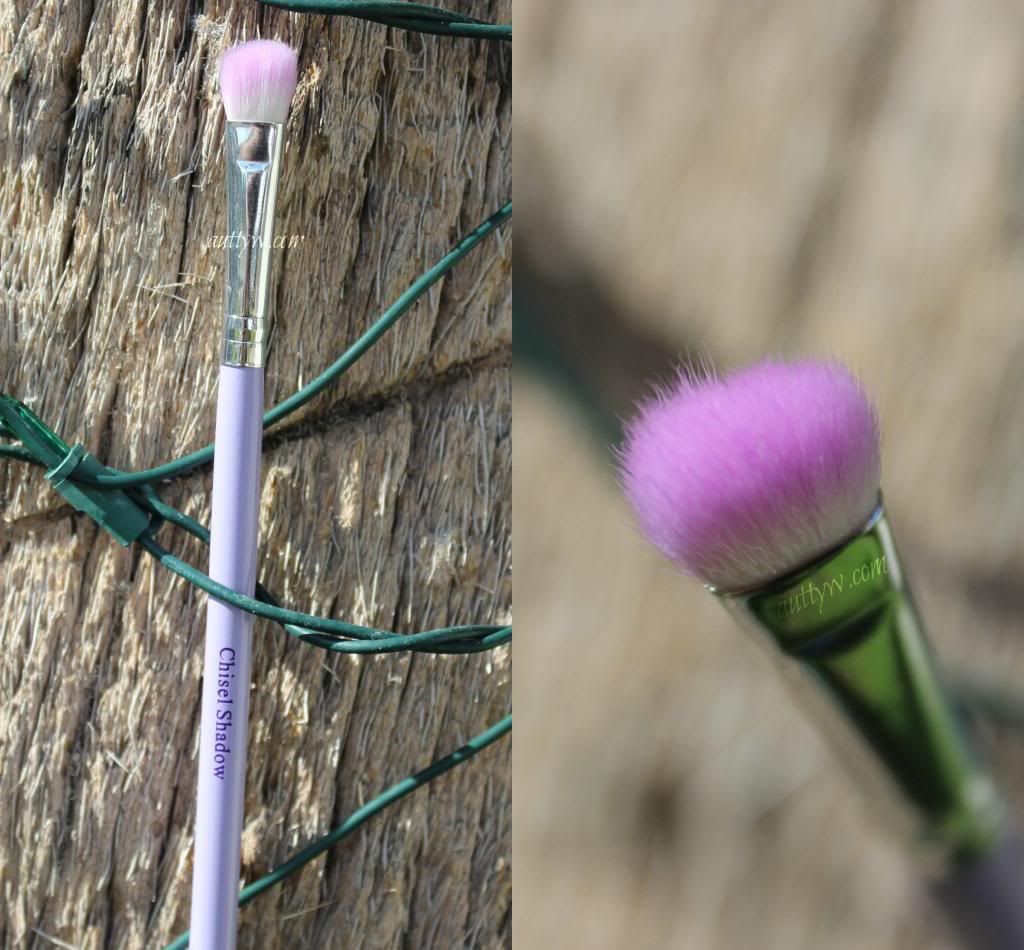
Chisel Shadow - 
I like this brush, I think it might be better for picking up loose shadows better than pressed. I didn't have too much of a problem with pressed shadows, but I did have to go back into the pan a couple times, which I normally don't have to do with my other brushes. As you can see in the picture on the right, the bristles aren't exactly uniform and a few are sticking up. That's okay, it doesn't change anything about the bristles. The brush is evenly balanced and for size reference, it's about a 1/2 inch shorter than the ELF Studio Eyeshadow "C" brush but it's about an INCH shorter than the Urban Decay Shadow brush (the one that comes in the Naked palette) 

Crease Blender - 
I really like this crease brush! I found the density of it to be perfect for me. If you have small lids though, this is probably a brush you won't like because it is a little big. I didn't have any issues at all with this brush and I don't really have any complaints! Weight wise, it's the same, it's not heavy at all, and for size comparison, it's practically the same height of the ELF Blending Eye Brush. The bristles are longer on the Crown brush one though, but just for reference they're the same height wise. 

Detail Liner - 
This brush in my opinion is the most useless out of the bunch. Maybe it's just me, but I have difficulty using liner brushes that are like this. Maybe if the bristles were more dense and not splayed out I could have given it a shot, but it's a bit too wide and I'd have panda eyes in a heartbeat. Size reference : The handle longer than the Real Techniques Pixel-Point Eyeliner Brush.

Deluxe Contour - 
This brush is actually the PERFECT size for getting a good contour for me! Once I lose some face chunk I'll have to show y'all my cheek bones. But I can get a really decent and precise contour with this. It doesn't pick up too much or too little powder. It also blends out extremely well, of course with anything you can over blend, so just be careful. This brush is the perfect density as well for doing contours, you could also use this for blush if that blows your skirt up! Size wise. It's the EXACT length of the Real Techniques Contour brush.

Tapered Blush - 
This brush is in my opinion the perfect size for a blush brush, at least for me. I don't like applying a lot of blush. Depending on your blush, you can pick up the perfect amount or too much. For me, using a MUA blush I picked up too much and I only tapped it barely once. So this does pick up a lot of blush. One tap was more than enough for both cheeks. Size wise, the two blush brushes I have are both bigger than this one, so it is on the smaller side but not by much. It's a 1/2 INCH smaller than the Makeup Forever 156 and about the same on the Real Techniques Blush Brush (the bristles on the RT brush are gigantic though)

Pro Powder - 
You know when something just doesn't wow you that you can't remember how it preformed? I don't find this brush any different then the other brushes that I use for powder. It's got a nice density and it picks up powder pretty well. That's all I really have to say about it. It performs just like my other brushes. It applies the right amount of powder but it doesn't pick up enough to make you look cakey. Size wise, it's slightly taller than the ELF Complexion &Powder Brush and it's slightly shorter than the Real Techniques Blush Brush (which I use for powder). The handle itself it kind of thick, think of a China Glaze bottle top, it can be a bit uncomfortable to hold after a while.

Tweezers - 
This is my second pair of Crown Brush Tweezers, the first pair I got at the makeup show and those I was not impressed. THESE however are awesome! A little too sharp, but they will dull down a little with some use (or just convince your husband to let you pull a few hairs from his beard muhahaha) and you will be good! I really like these tweezers and I am so so glad that I have them! They're cute and I wont lose them like I've lost every other pair I have. Seriously tweezers should have built in beepers so you can find them.


All in all, I really enjoyed this set. The brushes are all high quality brushes, they're soft, easy to use and pretty to look at. My only real qualm with the set is the case. The individual slots for the brushes could be sewn tighter. 3 out of the 6 brushes fall out easily if you're not careful. You can tell in the picture that the spots aren't really tight. That's my only issue with the case in a whole. The mirror is a really nice size and if you don't want to use it in the case, it slides out easily and you can slide it back in when you're done.

The HD Set w/ Mirror & Tweezers retails for $27.95 and is a complete STEAL for what you get.
You can purchase them HERE on Crown Brush's website.

Disclaimer: I am not affiliated with Crown Brush or iFabbo. The only compensation is to keep the product. All opinions are 100% my own. 

Wednesday, April 24, 2013

FOTD #8 - Blogger Inspired


Hello everyone!

This FOTD is inspired by a look that A Brilliant Brunette did a couple of days ago on her blog. It's her Ocean Sunrise Eyes look/tutorial. I absolutely LOVED it the moment I saw it and wanted to re-create it. 
Granted hers looks a million times better, but hey, I tried. That's all that counts! :P

Check out my re-creation after the jump!