Google+
Showing posts with label Sally Hansen. Show all posts

Wednesday, December 30, 2015

A Glittering New Years Eve with Claws Up

Contains Press Samples from SquareHue

I was talking to my girl Jacquie (Claws Up) on Snapchat one day (auttyw) and somehow we got on the topic of doing twin-nails for New Years Eve. Heck yes! I was so excited! We finally decided on a design and cue the existence of trying to find the perfect polishes to use. Then cue the stress of oh my polish gods, how am I going to do this dang cup?! Thank goodness for Google Images, you don't even want to know what the OG design looked liked! Calling it a mess was an understatement! I have no shame in admitting the fact that I worked on this way longer than I should have (almost three days) as well as I used the most ridiculous amount of nail polishes!

Lets back up a little bit and just explain what I went through. I had the design down packed and they looked awesome! ...Or well, my opinion of awesome, then it came to top coat them! Y'all know we need that extra shininess in our lives! Cue the huge sighs and freaking out, my top coat made the tips of my nails cloudy! I've had it happen before, but another thin coat fixed it right up! Not this time though, it made it worse! So, I had to go back and fix it and just....added even more polishes to try and cover up the fact that the top coat messed them up!

The freak out and stress aside, I'm actually really pleased with how these look and I can't wait to see how Jacquie's turned out! I'm really glad that we did these together! We are going to have another post together, but of course, I still need to work on it! It's not going to be that difficult though! I love doing collab posts, even though they are few and far between.

Mad props to you Jaq for listening to me freak out because I couldn't find the polishes and that I changed a setting on my camera and the OG pictures were messed up and just no bueno! You are seriously my best frand! I don't know what I would have done if it weren't for you girl!

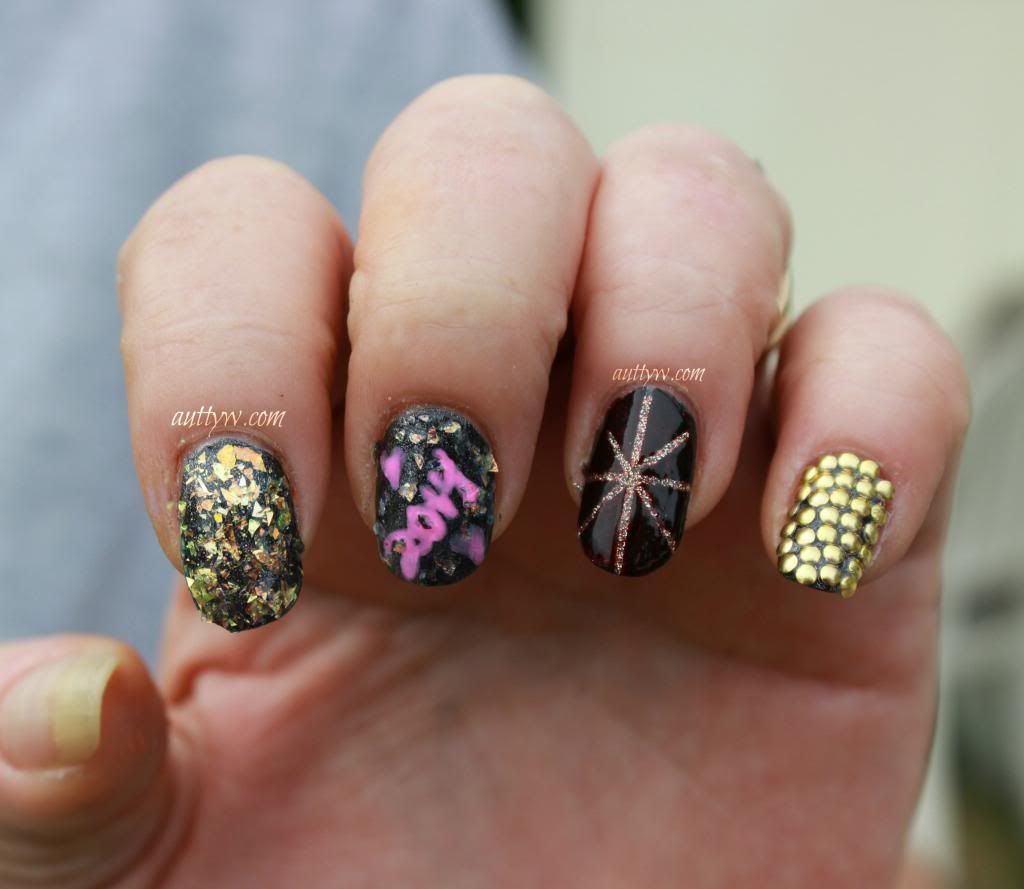
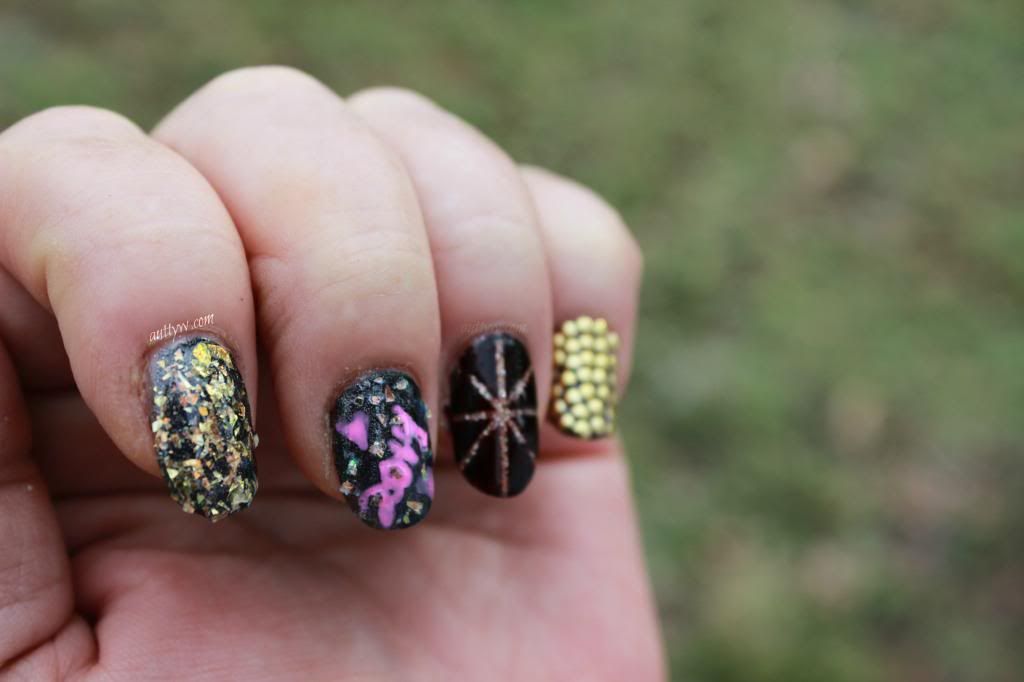
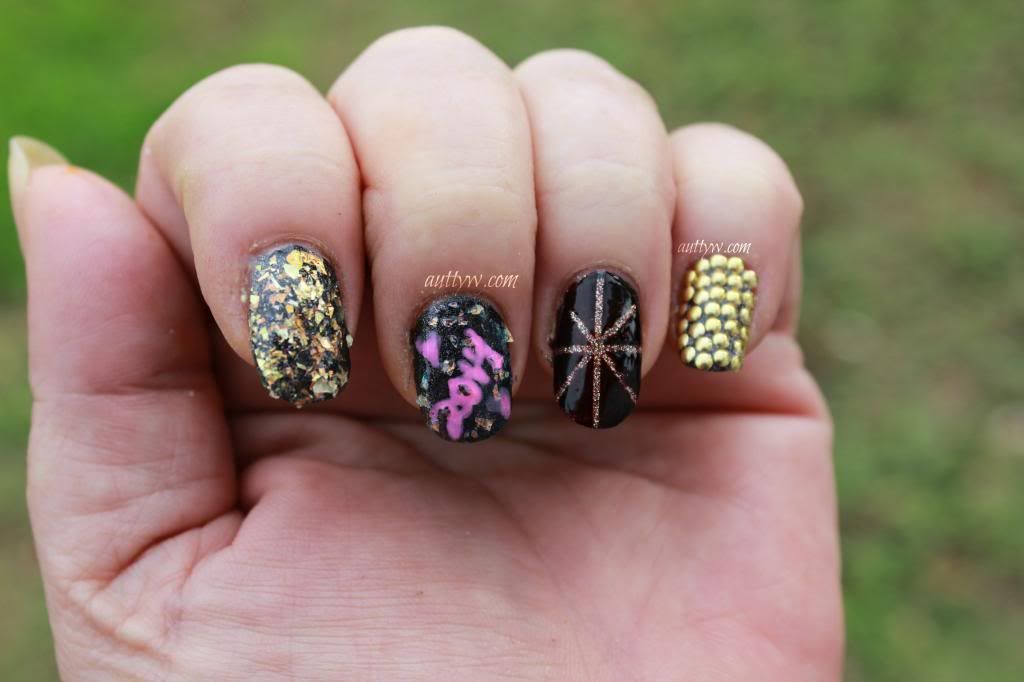
I've got two pictures for you! One with and one without the flash! Enjoy my Glitter New Years Eve Nails!


 They aren't perfect but you know what...nail art is not my jam and for a n00b, I think they are nice. :)

Polishes Used:In order from the pinkie to index
SquareHue 1921 Style & Speed
SquareHue 2002 Idol
SquareHue 1977 Night Fever
Wet n Wild Kaleidoscope

Cult Nails Nevermore
Sally Hansen I♥Nail Art Pen Neon Pink
China Glaze Travel In Colour

Cult Nails Nevermore
SquareHue Sampokeskus (12/14)
SquareHue 2001 Never Forget
Wet n Wild Kaleidoscope

ORLY Luxe
China Glaze Angel Wings
Wet n Wild Kaleidoscope

Oh So Wet Top Coat

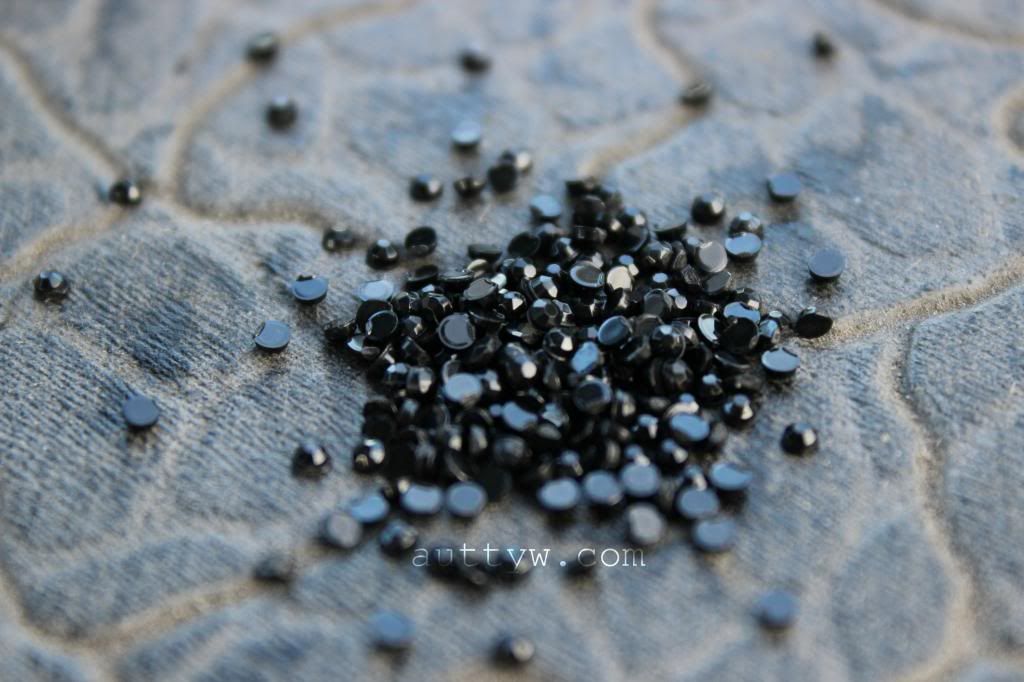
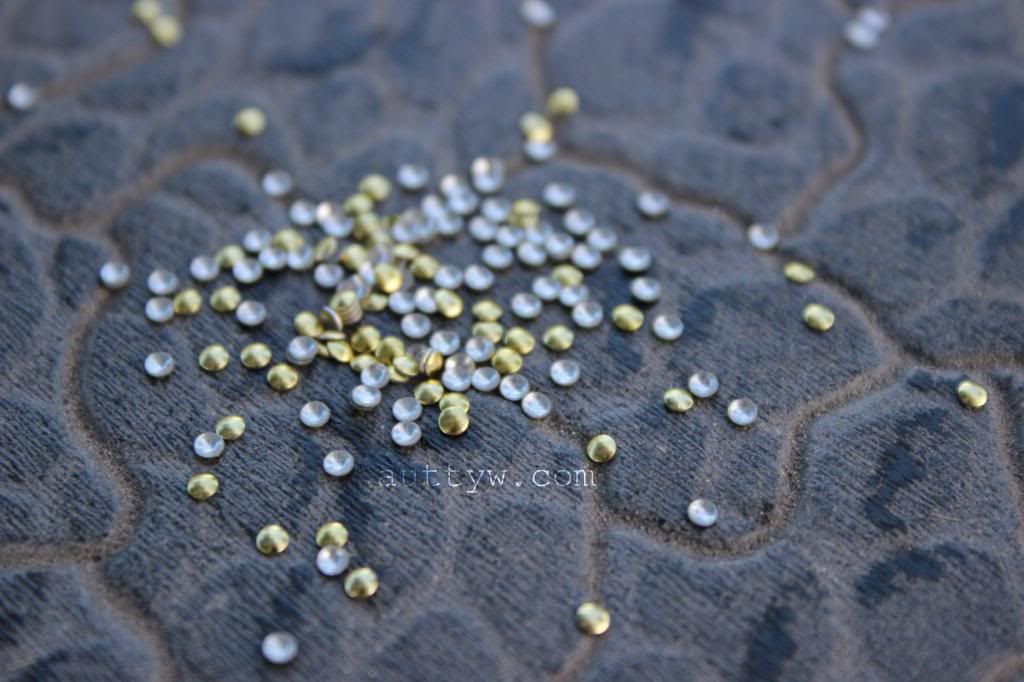
Jewels at the cuticle are from Sally Hansen

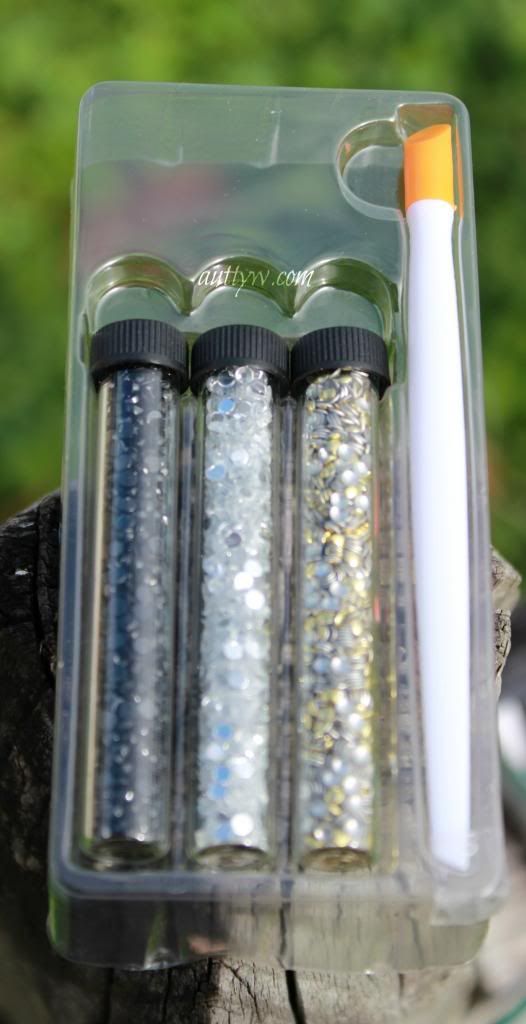
I told you that I used a stupid amount of polishes! 

I know it's a little messy but I like it :)

Go check out Jacquie's blog http://clawsup.blogspot.com/ and see what she did for her Glittering New Years Eve Mani! 

Also HAPPY NEW YEAR!!! I hope that you end 2015 on a positive note and start 2016 with a smile! :) 
♥♥♥♥♥
Autumn

Monday, January 20, 2014

Sally Hansen I heart Nail Art Studs

Purchased Myself

Today I've got some nail art studs to chit chat about! I've been getting REALLY very into nail art, especially studs, jewels and glitter placement. Don't be fooled by the tiny vials that these come in though, you definitely get a LOT of studs. I do want to give a tiny warning, the vials are GLASS and one of mine has already broken so you have to be really careful, or put them into something else.

For about $6.99 (depending on your region) you get three vials with three different colors of studs... as well as 2 different kinds (more on that later) You get black, clear/silver and gold. Now The gold ones are different from the other two, these remind me of Rivets while the other two, I would call rhinestones instead of studs, but that's me.

The kit comes with a cuticle pusher stick..thing... What is even the technical name for it? One end is a hard plastic "cuticle pusher" while the other end is more slanted and has a point. This is for applying the studs, but I say nay. I had the WORST time trying to apply the studs using this thing, not only that but if you're not careful you WILL mess up your nail polish. I use my fingers to apply these, then if need be I'll use the pointed end of the stick to move them around.


The Black studs are pure black.

The Clear ones have a silver base, so you get that kind of shift where you get a hint of silver.

The gold studs are gorgeous. These are probably my favorite out of the trio.

I think that this kit in a whole is pretty awesome and I LOVE that they come in vials instead of a wheel.  I did take mine out of the vial because on broke. For $6.99 I think that it definitely should come with more options.. If you go to an Indie polish maker that sells studs or jewels I'm sure you can get more of a variety for cheaper. I know Cult Nails used to have a gem wheel, but I don't see it on the website anymore.

I do like this kit, but honestly the price point is a bit high for me. Maybe I'm too cheap or something but I paid around $3 (i think) and got 12 different kind of rhinestones from Cult Nails when she stocked them. So there are totally cheaper (but equally as good) retailers out there!

Tuesday, December 31, 2013

New Years Nails!

Purchased Myself / PR Sample

Hey everyone! I hope you all are having a safe New Years Eve so far! Or if you're reading this after, I hope you had a safe New Years! May 2014 be nothing but blessings!

Originally, this was going to be one post, with nails and makeup, but I decided to just split it up. 


I used one base polish on ALL of the nails.
ORLY MatteFX Iron Butterfly
Index - Cult Nails Feedback
Middle- Sally Hansen I <3 Nail Art Neon Pink & China Glaze Luxe & Lush
Ring - Cult Nails Blaze & Lamestain
Pinky - Sally Hansen I <3 Nail Art Studs
Topped with Glisten & Glow HK Girl top coat

I really like how this manicure turned out. Granted I only did the 4 nails, but I still really like how it turned out! I wish this was on my nails I would be totally be happy! 

For some reason, I really love this picture. I love how Cult Nails Feedback is front and center and it looks exceptionally awesome over Iron Butterfly. 

Even though my 2014 is messed up thanks to my Niece, I love the mani in it's entirety. I must say, I'm pretty damn impressed with myself. 

What's on your nails for New Years?!

Disclaimer: Glisten & Glow HK Girl top coat was provided for PR purposes. The rest of the polishes were purchased by me with my own money.

Wednesday, December 4, 2013

Power Gel Polishes


I was reading through the November 2013 Marie Claire magazine and I cam across a page where they talked about.. okay BARELY talked about 5 DIY gel manicure systems that keep your polish looking applied for up to two weeks. I say barely, because they were just teeny tiny blurbs about each one. The main purpose of this post is I kind of want YOUR opinion. Out of the 5 listed, which ones have YOU tried and which ones do YOU like.

First up!

ORLY SmartGels
Each polish is $10 and the starter kit retails for $60
SOURCE 
SOURCE

Sally Hansen Salon Gel Polish (NOT the gel strips)
$13 per color. Starter kit is $70
SOURCE
Source - Google Images


Mally 24/7 Gel Polish
Ive personally NEVER heard of these. I know OF the Mally brand but didn't know they/she did polish
$15 per polish. $65 for the system
SOURCE

Sephora by OPI GelShine
I didn't know S.O.P.I had gel polishes.
$18 per polish. $159 for the system
SOURCE - Sephora.com

Red Carpet Manicure
$10 per polish. $80 for the pro kit.
SOURCE
SOURCE

So, which ones have you tried?! I've personally not tried any of these. I've tried the Sally Hansen Gel Strips, but not the Gel Manicure system. That one was a bit expensive for me to flat out buy. I'm curious on your opinions!


I am not affiliated, part of nor was I asked to write this post. I did it on my own. 

Friday, August 2, 2013

Sally Hansen Fuzz-Sea revisited

Hey everyone!
I hope that you all are doing well! I've been trying to get into writing blog posts but I've had a constant migraine that just wont go away. Enough about that.

The reason I decided to revisit Fuzz Sea is because Martha (QCPChic) had mentioned that she wish she could see them over different colors. So! I shall do it! =^_^=

There was no particular reasoning to the colors that I picked. I just opened one of my makeup drawers and grabbed 4 colors.

Pinky - ORLY Luxe
Ring Finger - Venique Dominating Thigh Highs
Middle Finger - Essie Mojito Madness
Index Finger - Zoya Blu

Like I said, no particular order when picking polishes out.
This is one coat of Fuzz-Sea over each finger. I really love this polish and I think that each individual polish looks fantastic under Fuzz-Sea.

What do you think?!
All above polishes I purchased myself.

Wednesday, July 31, 2013

Sally Hansen Fuzzy Coat -Fuzz Sea

I purchased myself
Hello everyone!

This is a post that I don't know why I haven't put up yet. Wait, okay I lied. Shame on me. I don't like how ANY of the pictures came out. Le sigh life of a blogger aye? They're not bad, I just don't personally care for them. (the pictures I mean)

SO among the textured nail polish trend we also have the matte glitter trend. Whether it's bar glitter, hex glitter, micro round glitter, etc. They're both pretty strong trends that I don't see dying soon.
Sally Hansen Fuzzy Coat is their version of the Nails Inc Feathers polishes that came out in the UK and recently the US.

I only have one out of the entire collection. I would have liked to get the rest of them but was put on a No-Buy by Chris for The Makeup Show in September. Super lame D:

Fuzz-Sea is a blue and yellow matte bar glitter in a clear base.

Tuesday, January 1, 2013

Discontinued Sally Hansen Products?!

Hello Loves!

I have a different type of post for you, it is going to be ALL ABOUT discontinued Sally Hansen Products.

What on this bloody Earth made me decide to do this blog post?! Welp, here in the United States it is that time of the year when Walgreens and CVS do their extensive Clearance sales of the beauty department. Getting rid of products that aren't selling, being discontinued, repackaged, reformulated, etc...

Back in the beginning of December I bought a Sally Hansen Continuous Growth Treatment on EXTREME clearance... I mean a $10 bottle for less than $2. Holla you know I was all over that like a fly on shit. (excuse the language) I LOVE sales, especially clearance sales.
Well, I was applying some of this lovely elixir of growth treatment... I realized it is almost gone.. yes, I have gone through almost a FULL  0.45 fl oz (13.3 ml) bottle in around 1 month... that is how much I love this. It is amazing.. I am planning a review, I just need before and after pictures...I'm currently working on it since I JUST had a nail break...


anyways... I wanted to share the list that is on the Sally Hansen website, just in case you all have some favorite products that are being discontinued.. so you can stock up.


First in the Nail Polish portion the

14 Day Nail Shield


[caption id="" align="aligncenter" width="275"] SOURCE[/caption]
 Continuous Treatment Hardener


[caption id="" align="aligncenter" width="275"] SOURCE[/caption]


Foot Care

Overnight Heel Repair


[caption id="" align="aligncenter" width="275"] SOURCE[/caption]
Revitalizing Foot Soak


[caption id="" align="aligncenter" width="275"] SOURCE[/caption]


Lip Care

Lip Shimmer Plumping Balm


[caption id="" align="aligncenter" width="275"] SOURCE[/caption]
PM Lip Plumper


[caption id="" align="aligncenter" width="275"] SOURCE[/caption]
Vita-A Lip Line Smoother


[caption id="" align="aligncenter" width="275"] SOURCE[/caption]
Vita-E Lip Soother


[caption id="" align="aligncenter" width="275"] source[/caption]


Please remember that this is the list from the Sally Hansen website itself. I will keep it updated as best as I can.


Also, I am not affiliated with Sally Hansen.  I did this post that way those who love buying SH products, know what is being discontinued. All pictures are from SallyHansen.com


Signature 2

Monday, December 24, 2012

Wearing Your Heart On Your Nails .. Tutorial

Hello everyone!

This is my first time doing a nail "tutorial". So please bear with me! xx

In my NOTD for my birthday, I had put hearts on my nails and had asked if you wanted me to show you how I did them.  The lovely Rose wanted to see how it was done, so I figured I better do it before I forget. I'm going to be wearing these nails for Christmas so I did them in red and green. The hearts are a bit hard to do at first I must admit, but once you get it down how to make them, it goes pretty quickly.

You could use a dotting tool, but I don't have one. I used a Bobby pin, it's pretty much works the same way as a dotting tool. You just have to be a bit careful with the end of the bobby pin, I have realized that. So onto the tutorial!

Oh.. I am by no means good at doing nail art, so please don't mind them :P

What you will need:


1 bobby pin pulled apart


Your nail polish's of choice


Base coat


Top coat


Something to put your nail polish on.


Cuticle Oil (extremely optional)


directions:


First of all, you need to paint your nails. It doesn't matter the color. For this I used China Glaze 3D Fantasy. It's a holographic red polish.(it has been discontinued unfortunately, but with the influx and popularity of holographic polishes you will be able to find something like it.) I used two coats of this. I was to STRESS THE IMPORTANCE of letting this base coat dry completely. To where you can press on your nails and not seen any type of indentation. If your nail polish is not completely dry, it will mess the rest of your nail up.


Take your second color and place a small amount of it on the surface you choose. (It could be a piece of paper or I used the lid to my Bath & Body Works candle since I can clean the polish off and reuse it) With this step, do not place a lot, because it will start to dry and could mess your nail up as well.
Make your two dots on your nail where you want the heart to be. In this picture I places them pretty far apart, but the closer the dots the better the heart comes out in my opinion. The farther the dots the bigger the heart and it becomes a bit more complicated to get it looking uniform. This nail polish is Orly's Jealous, Much?


How far apart you place your dots also depends on the side of your nail as well. My ring finger's nail is quite large so.. :P


The next step requires you do dip back into where you places your spot of polish. The reason for this, is so that it is easier to drag down and create your first part of the heart.


Place the bobby pin in one of the first dots and draw down in a diagonal. Then repeat with the other dot.


And there you have it! Your very own heart manicure! This is perfect for valentines day, BUT I am deciding to use this for Christmas. :)


Let the heart dry and apply your top coat. If you want your nails to be completely smooth, you may need to add a second layer. In the picture above, there is no top coat as of yet because I am not quite done, they needed to dry :P


On the tips of my nails I used China Glaze Glistening Snow and on my left for the hearts I used Jolly Holly from China Glaze's 2011 Holiday collection.


(Okay no idea what happened to my nails. Over night they chipped and the polish shrunk. I'm very sorry for them looking like crap in the last two pictures.)


For my base coast I used Sally Hansen's Continuous Growth treatment and my top coat is Out The Door.


Tip: The hearts that you do with your dominant hand will wind up looking better than those done with your non-dominant hand..at least that is how it is for me :P


If you try this out, tweet me a picture! I would love to see how they come out!


Signature 2

Thursday, December 20, 2012

Birthday Nails!

Hello everyone!

I hope you all are doing well! Have you gotten your Christmas shopping done?! I know I haven't. I only have to get a couple of things though, so it's not too bad! :P

Since my Birthday was the 19th, I wanted to try a little nail art.

I painted each hand opposite of the other.


This was my first time ever trying to do any type of nail art, so they aren't perfect but I thought they were extremely cute!! :D


The polishes I used were:


Sally Hansen Continuous Growth Treatment


Orly Artificial Sweetener (pink)


Orly Faint of Heart (grey)


Out the door top coat.


(I won these in a giveaway, I know they were a collection, but I'm not sure you can get them anymore :( )


To make the hearts I just used a bobby pin :) Do you want me to do a tutorial showing how to do it?


Oh, that random piece of red on the one nail, is a piece of a rose. I was slightly bored when I started doing these nails. Haha.


I really love how they turned out! :D


Signature 2